How To add & Manage your Roster
1. Gather Your Team's Information
You will need each player's first and last name, unique jersey number, and a parent/guardian email address. Date of birth is not required but recommended to proplery help match waiver status.

Note: All columns must be included when uploaded
CSV Template
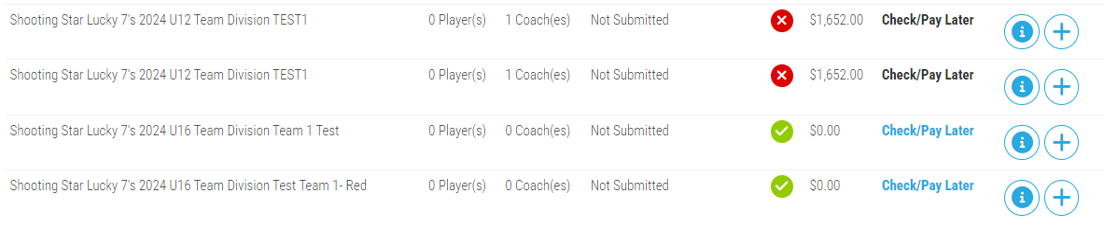
2. find Your Team
Log into your PlayerFirst account to view and manage your TEAMS
3. Enter your roster
Select the + icon to add your roster.
When adding a roster for the first time, you will be prompted to Agree to Terms of the tournament.
Select the method for entering your Roster- from Scratch or a previous roster
Click the Add to Roster button
Add Athlete Row to type in each player's information, or Upload Roster to import a CSV file
4. Save Roster
To Save your roster all required athlete and coach information must be complete.
For Coaches - a cell phone and email for each coach is required and one coach must be designated as the Head Coach

5. Send waivers and Roster Emails
Request completion of waivers, parent/guardian contact information be updated, and the athlete profile is checked to ensure athletes are eligible to play and all recruiting information is correct if necessary.

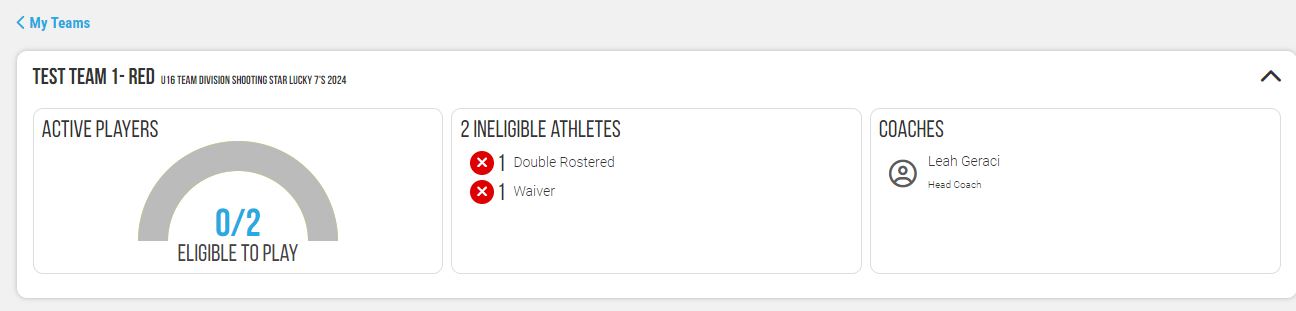
6. Manger your Roster & Waiver Status
You can manage waiver status, add players, and send reminders from your TEAM Page.
7. Finalize rosters
Once you have added your coach(es), finalized your players, and all waivers are signed, Finalize your Roster.
Only waivered players listed on the final roster submission will be allowed to participate in the event.

Click MY TEAMS To Start your Roster